目录Outline
01
Stripe 支付集成Stripe Integration
02
多智能体协作Multi-Agent Collaboration
03
作业Homework

要卖的产品与价格。一个 Product 可挂多个 Price。The product and its prices. One Product can hold many Prices.
持续订阅关系。The ongoing subscription relationship.
Stripe 异步通知你的后端付款结果——本次支付集成的关键机制。Stripe asynchronously notifies your backend of payment results — the key mechanism of this integration.
| 计费类型Type | 说明Description | 示例Example |
|---|---|---|
| 一次性 One-timeOne-time | 买断,付一次,不续费。Pay once, no renewal. | 终身版 $199Lifetime $199 |
| 周期订阅 · 按月Recurring · Monthly | 每月自动续费。Auto-renews every month. | $9.9 / month |
| 周期订阅 · 按年(包年)Recurring · Yearly | 每年自动续费,通常折算下来更便宜。Auto-renews yearly, usually cheaper per month. | $99 / year |
| 自定义周期Custom interval | 每周 / 每季度 / 每半年等。Weekly / quarterly / semi-annual, etc. | $25 / 季度$25 / quarter |
| 阶梯 / 按量 Tiered · UsageTiered · Usage-based | 按用量或阶梯计费(进阶)。Charge by tier or usage (advanced). | 前 1000 次免费,之后每次 $0.01First 1000 free, then $0.01 each |
组合玩法:同一个 “Demo Pro Plan” 产品下同时建「月付 $9.9」和「年付 $99」两个 Price,前端让用户选月付还是年付,各自对应不同的 Price ID。Combination: under one "Demo Pro Plan" product, create both a "$9.9/month" and a "$99/year" Price; the frontend lets users pick monthly or yearly, each mapping to a different Price ID.
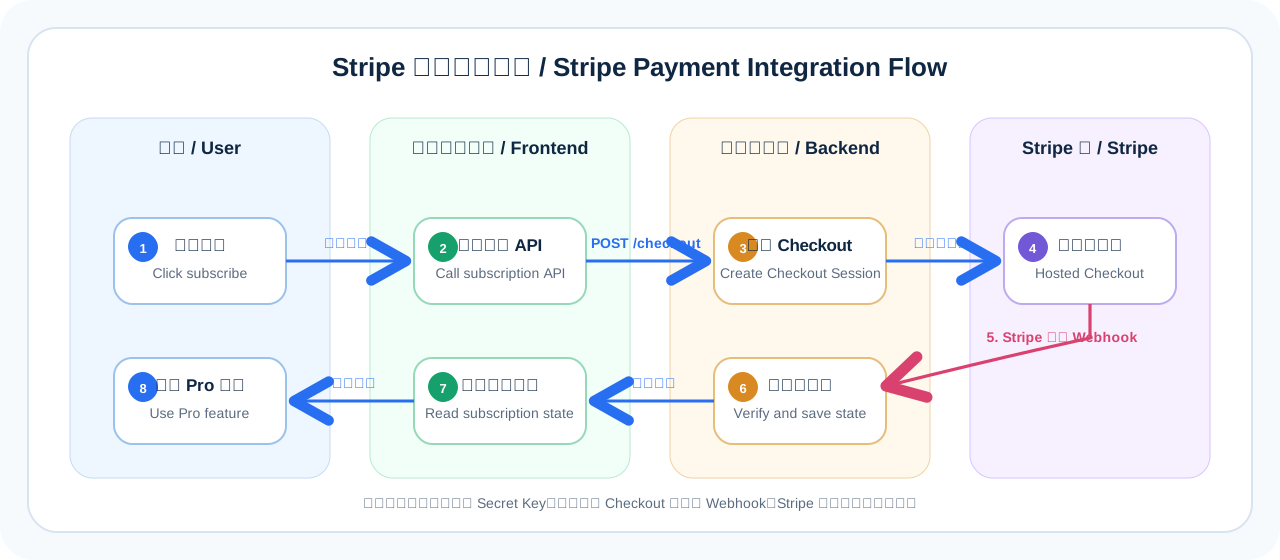
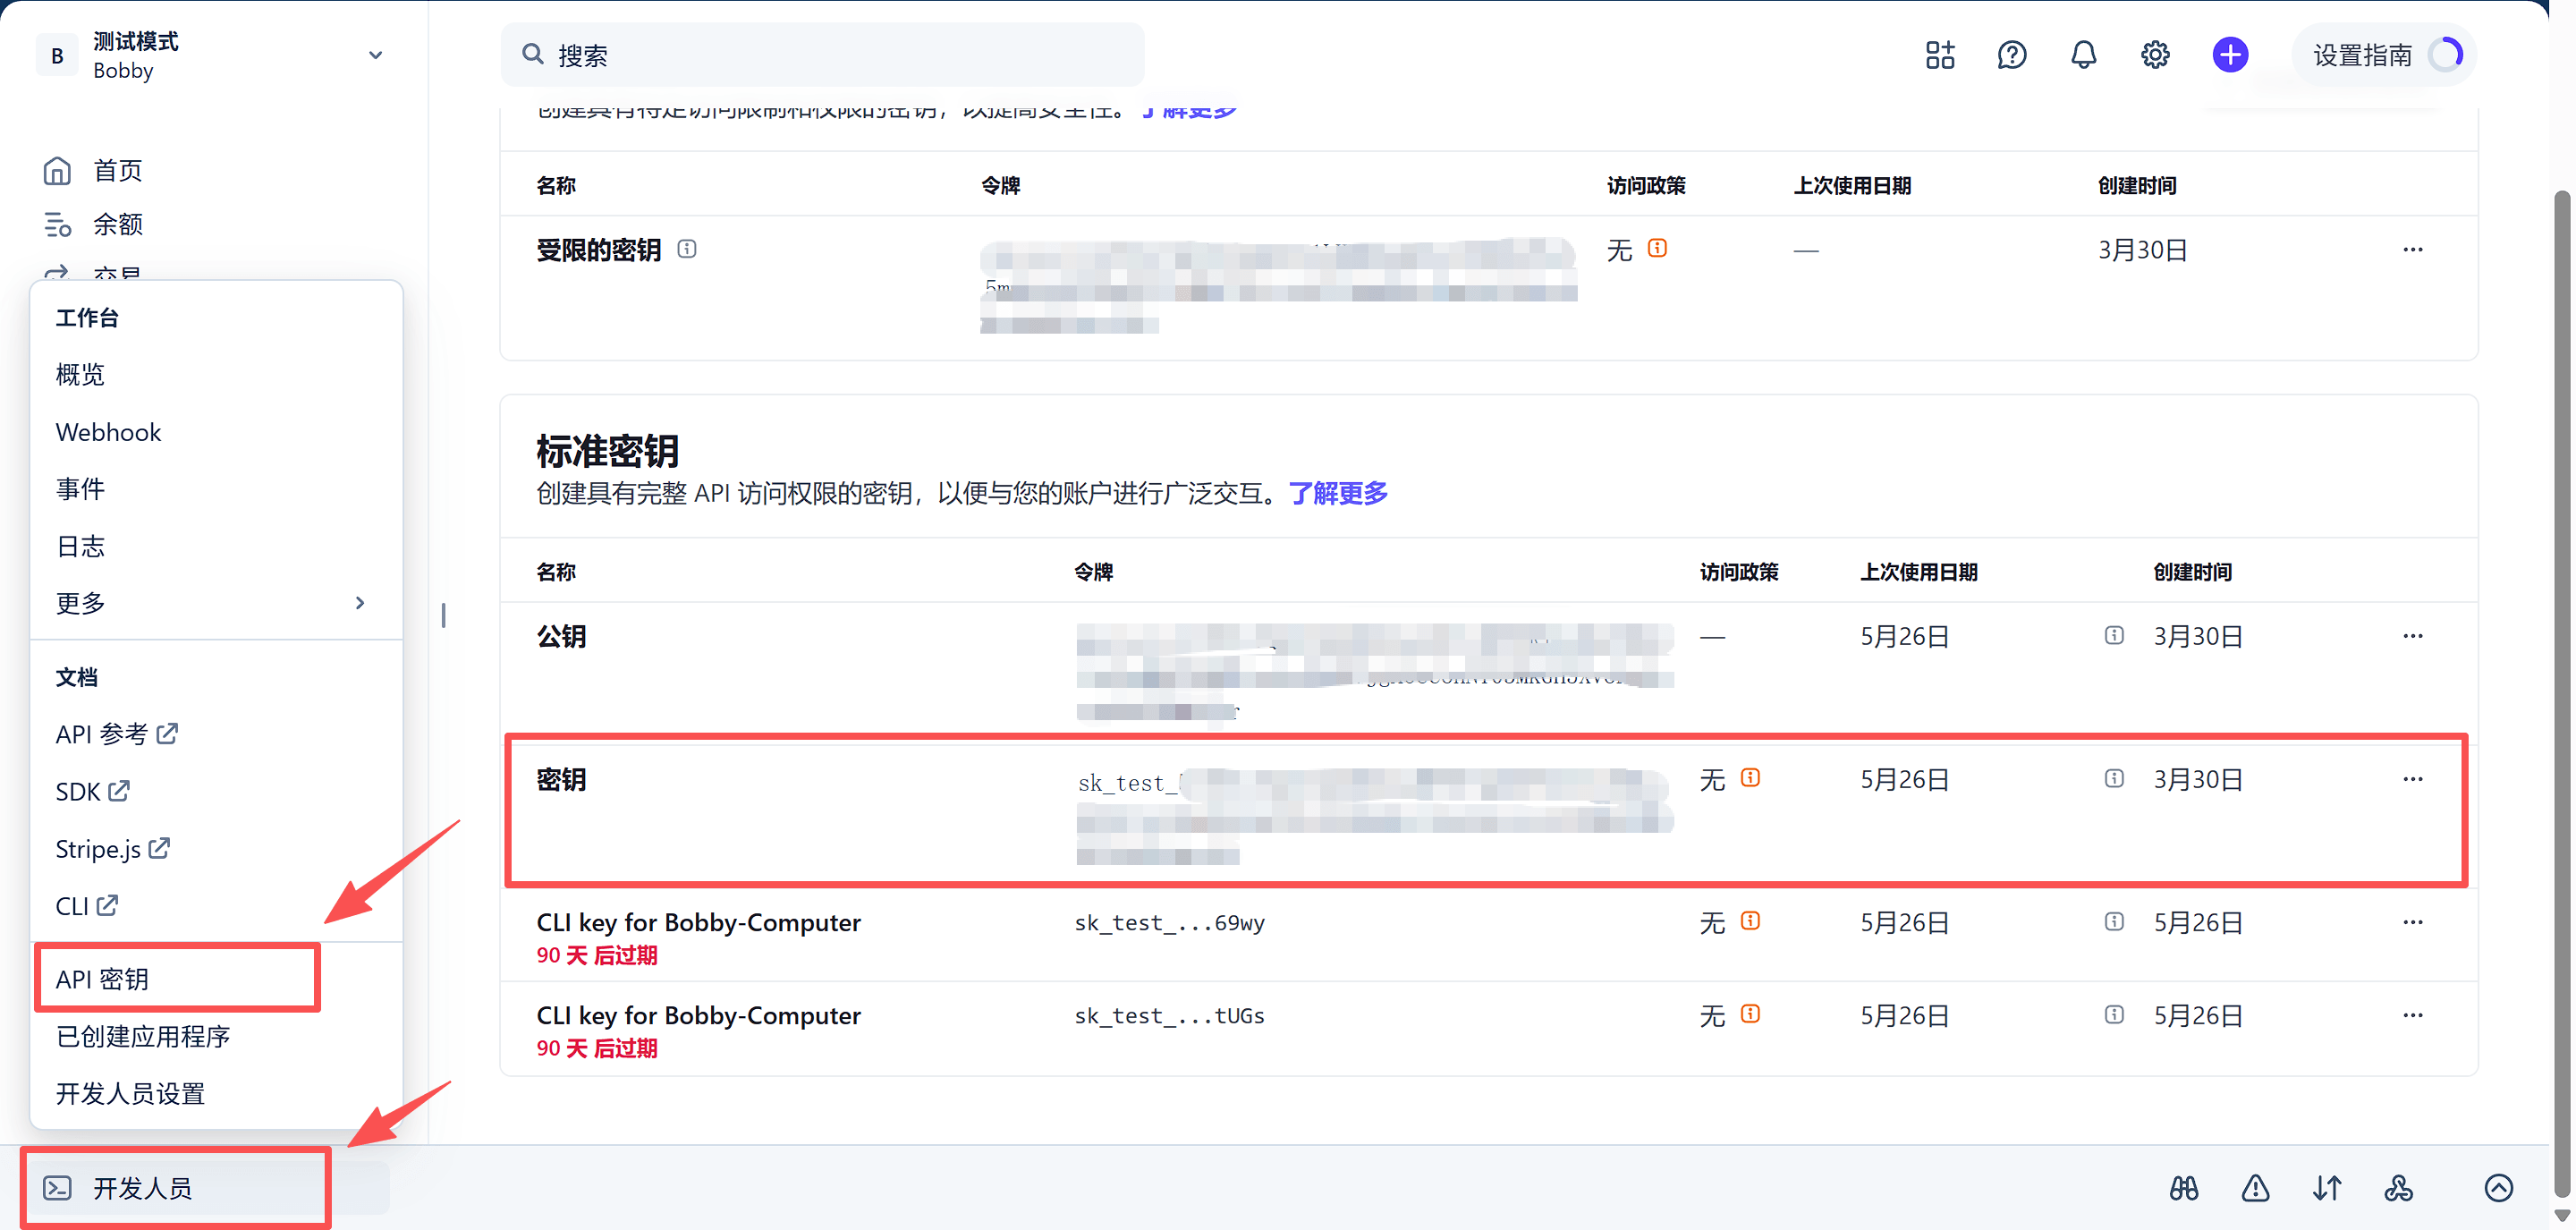
从上面 Dashboard 会拿到两样东西,先复制留好:You'll get two things from the dashboard above — copy and keep them:
STRIPE_SECRET_KEY = sk_test_...   # 后端用
STRIPE_PRICE_ID   = price_...
这两项具体填在哪个文件、用什么变量名,下一页让 AI 结合你的项目告诉你,这里不用写死。安全底线:Secret Key 只放后端,前端绝不能出现 sk_test / sk_live。Where exactly these go — which file and variable name — the AI on the next page will tell you based on your project; no need to fix it here. Security: keep the Secret Key backend-only, never let sk_test / sk_live appear on the frontend.
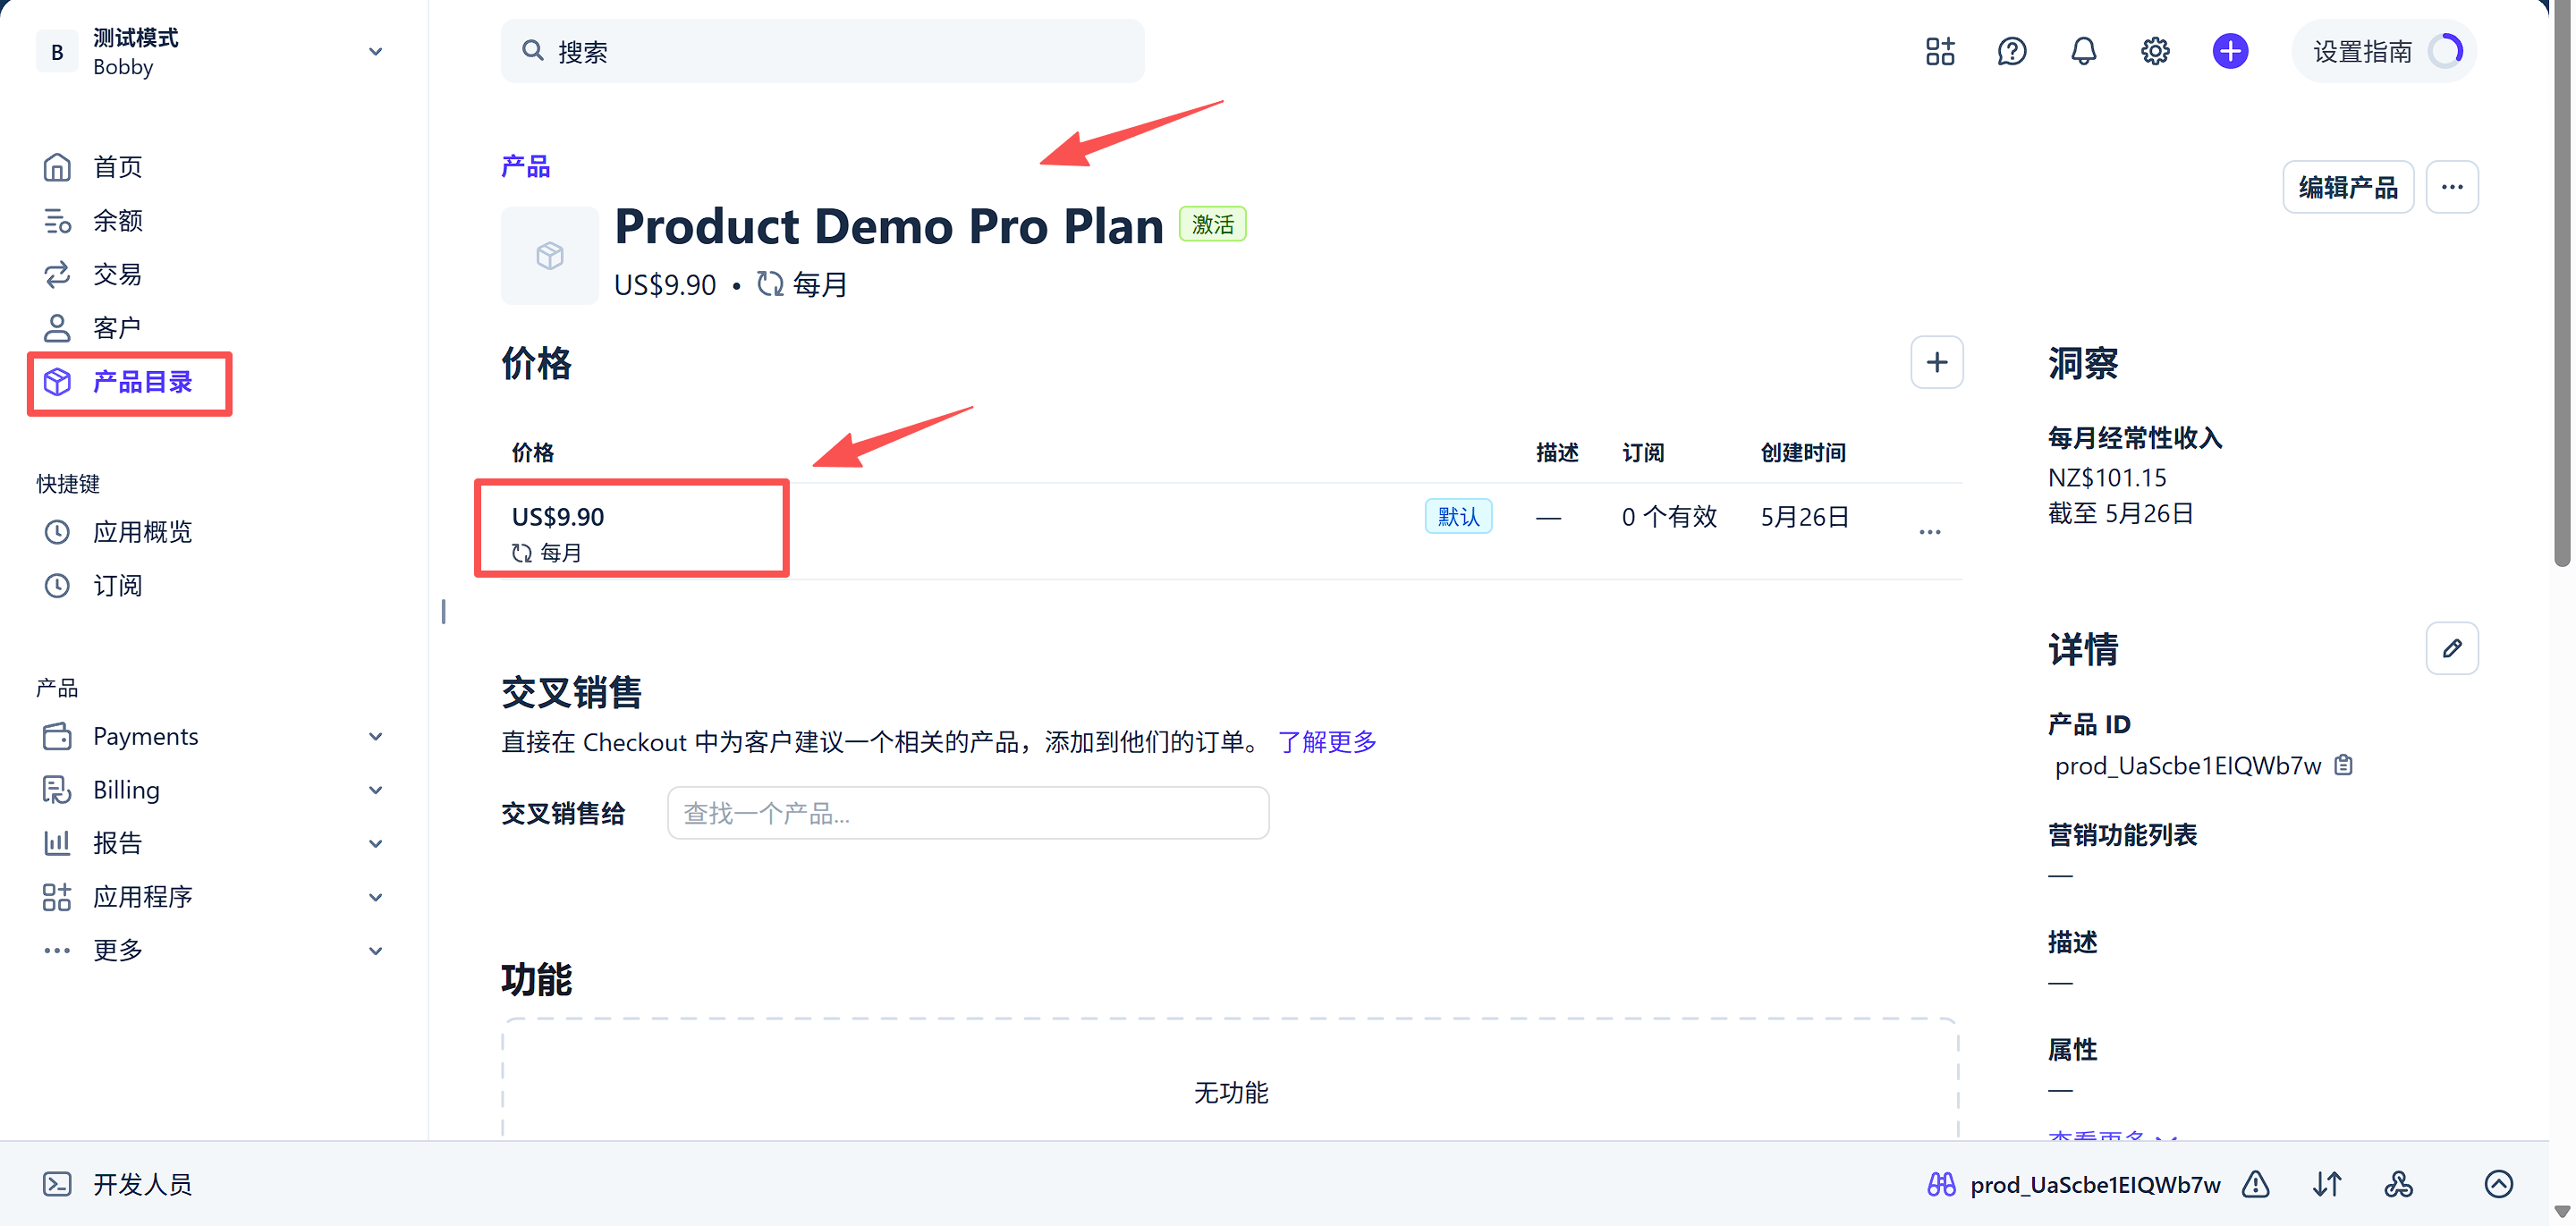
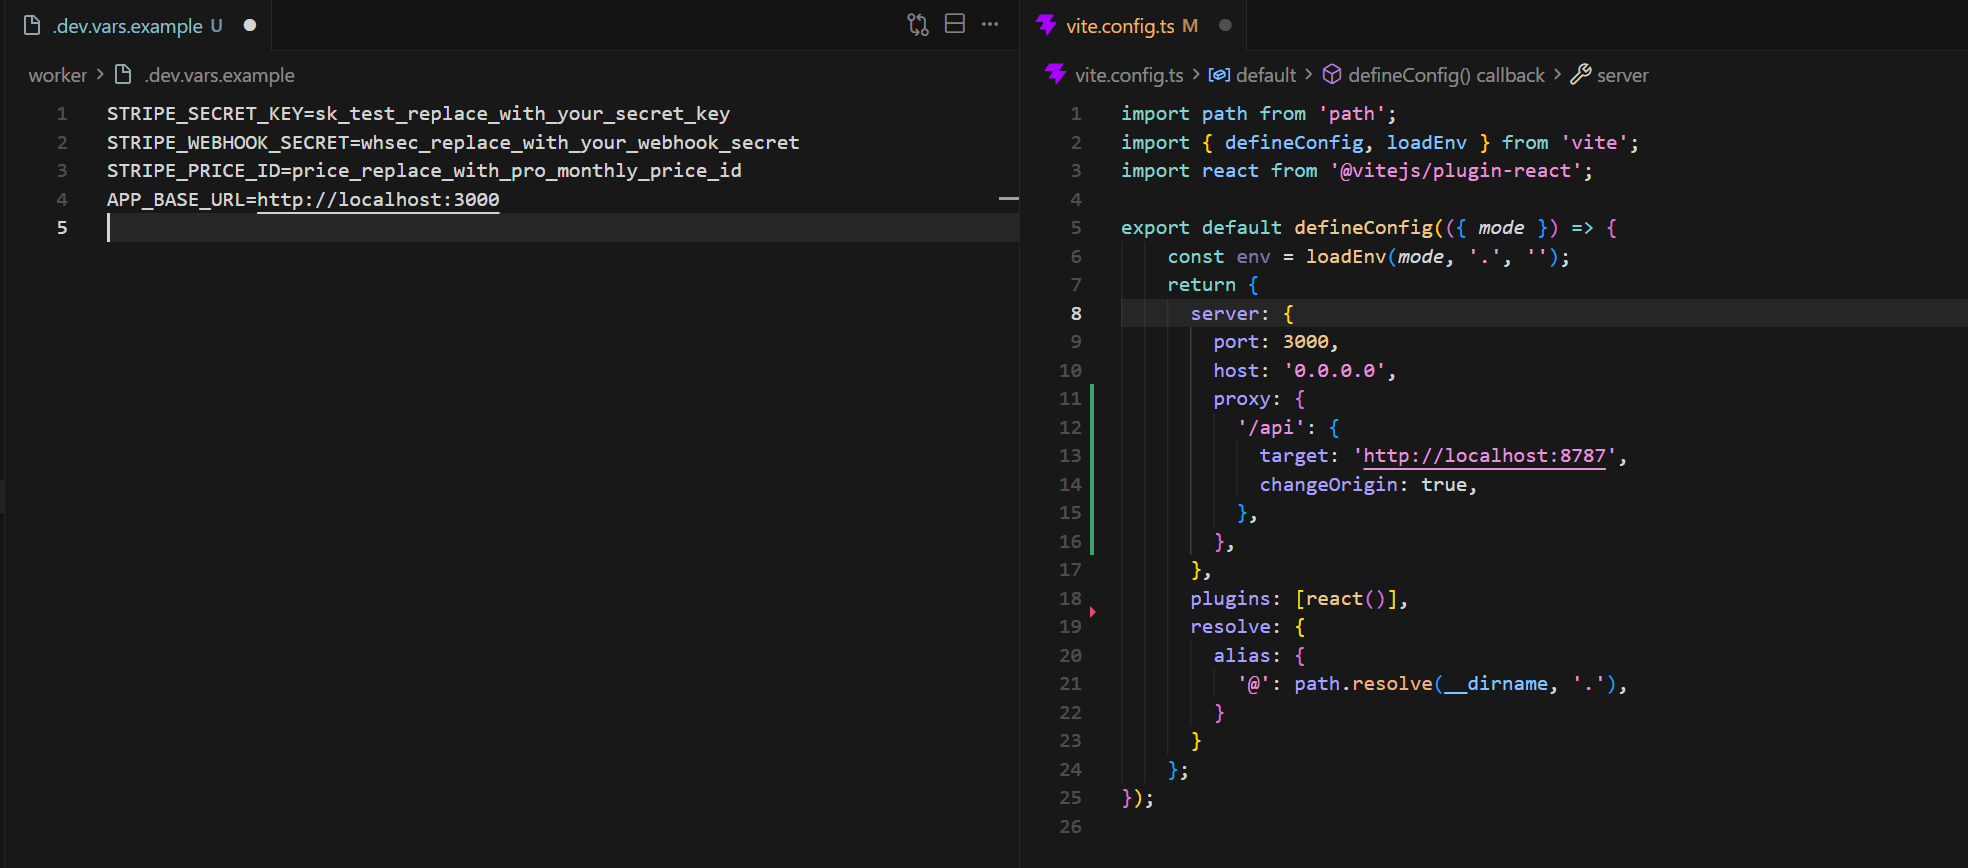
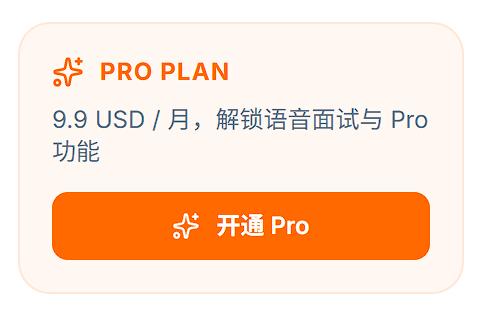
演示目标:浏览器点“开通 Pro” → 跳到 Stripe 官方付款页。Demo goal: click “Upgrade to Pro” in the browser → redirect to Stripe Checkout.
请在当前项目实现固定金额 Stripe 月订阅入口。

【项目背景】
- 前端栈:【例:React + Vite / Vue / Next.js】
- 后端形态:【例:Cloudflare Worker / Firebase Functions / Express】
- 用户系统:【例:Firebase Auth / Supabase / 自建】

【实现要求】
1. 后端暴露接口(如 POST /api/billing/checkout),调 Stripe 创建 Checkout Session 并返回付款页 URL
2. 创建 Session 时把当前登录用户的 ID 通过 client_reference_id 带过去(后续 Webhook 要用)
3. 前端加“开通 Pro”按钮,点击调后端接口拿到 URL 后跳转
4. 支付完成 / 取消后,回到用户发起支付时所在的页面:由前端把当前 window.location.origin 传给后端,后端据此动态拼 success_url / cancel_url,不要把回跳地址写死在环境变量里
5. Stripe Secret Key 不能暴露到前端
6. 请一次性把上述功能全部实现,代码里预留好读取 Stripe Secret Key 和 Price ID 的位置;不要中途停下来等我。完成后在最后清楚告诉我这两项该怎么配:
   - 分别应该填在哪个文件 / 哪个环境变量里(给出确切文件名和变量名)
   - 分别去 Stripe 后台的什么位置获取
   - 我填好后怎样让服务读到它们(如需要重启,给出命令)
7. 沿用项目现有代码风格和样式
Implement a fixed-price monthly Stripe subscription entry in the current project.

[Project context]
- Frontend stack: [e.g. React + Vite / Vue / Next.js]
- Backend shape: [e.g. Cloudflare Worker / Firebase Functions / Express]
- User system: [e.g. Firebase Auth / Supabase / custom]

[Requirements]
1. Expose a backend endpoint such as POST /api/billing/checkout, create a Stripe Checkout Session, and return the Checkout URL
2. Pass the current logged-in user ID through client_reference_id for the later Webhook
3. Add an “Upgrade to Pro” button on the frontend; click it, call the backend, receive the URL, and redirect
4. After success / cancel, return the user to the page they started from: the frontend passes its current window.location.origin to the backend, which builds success_url / cancel_url dynamically — do not hardcode return URLs in environment variables
5. Never expose the Stripe Secret Key to the frontend
6. Implement everything above in one go, leaving code hooks that read the Stripe Secret Key and Price ID; do not stop to wait for me. When done, clearly tell me how to configure these two:
   - which file / which environment variables they belong in (give exact file and variable names)
   - where in the Stripe dashboard to obtain each one
   - how to make the service pick them up after I fill them in (give the restart command if one is needed)
7. Follow the existing project style and code conventions
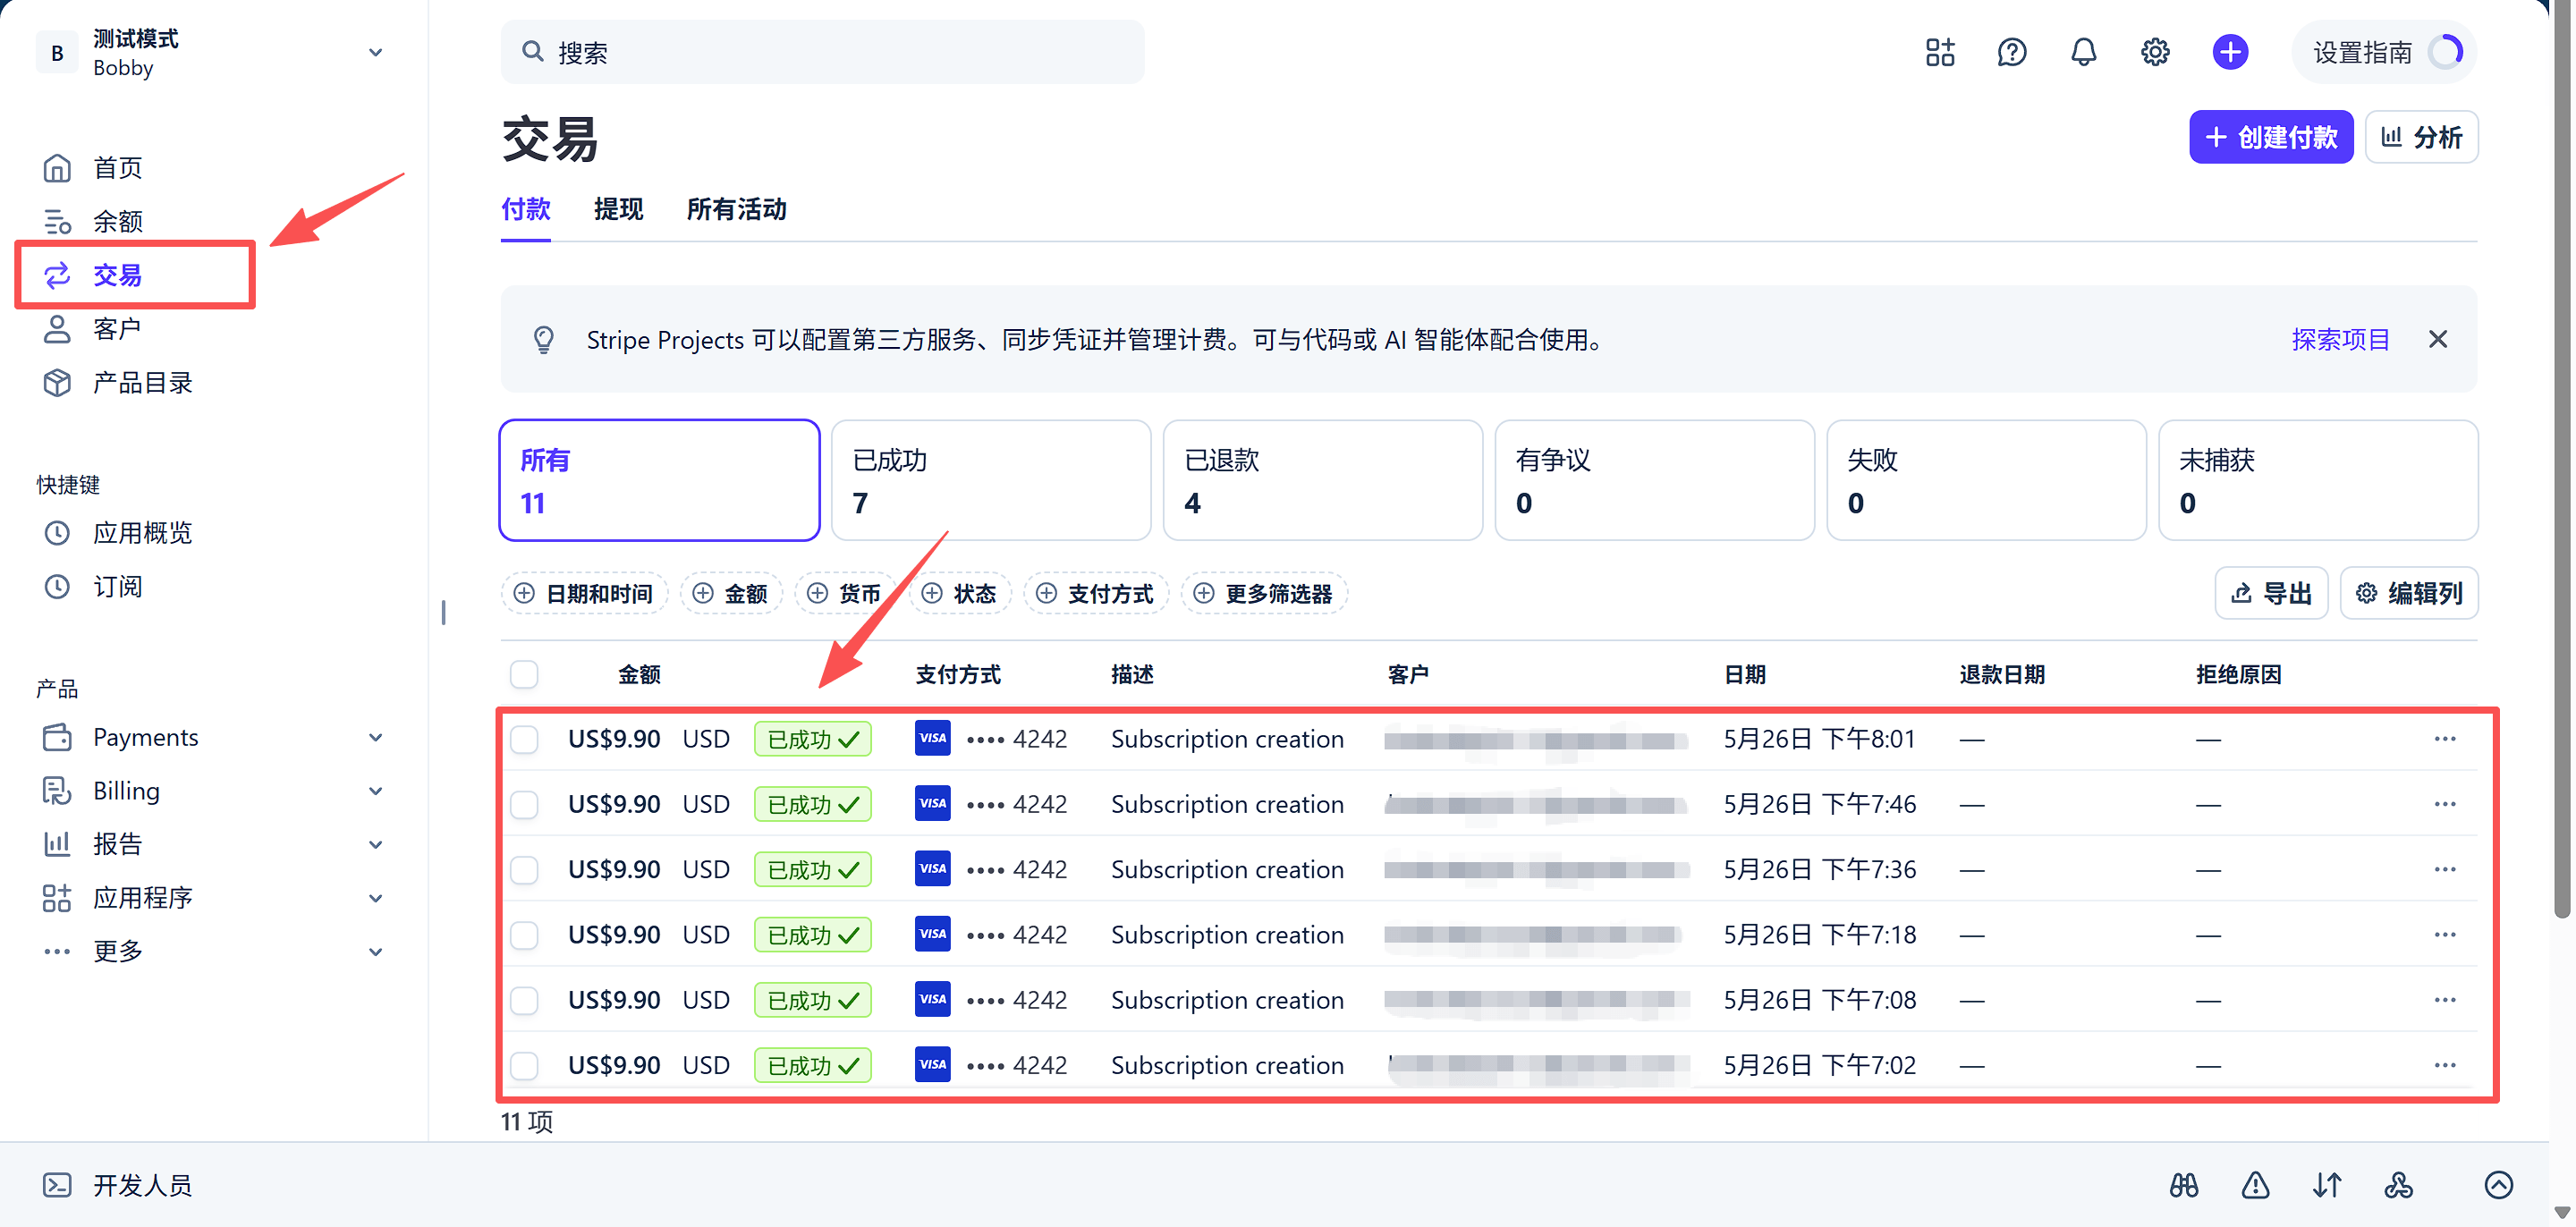
当场跑通验收:浏览器看到“开通 Pro”按钮 → 点击 → 跳到 Stripe Checkout 页面(显示 Demo Pro Plan · US$9.90/月)→ 前端代码 grep 不到 sk_test。Live check: browser shows “Upgrade to Pro” → click → Stripe Checkout page appears (Demo Pro Plan · US$9.90/month) → frontend code does not contain sk_test.
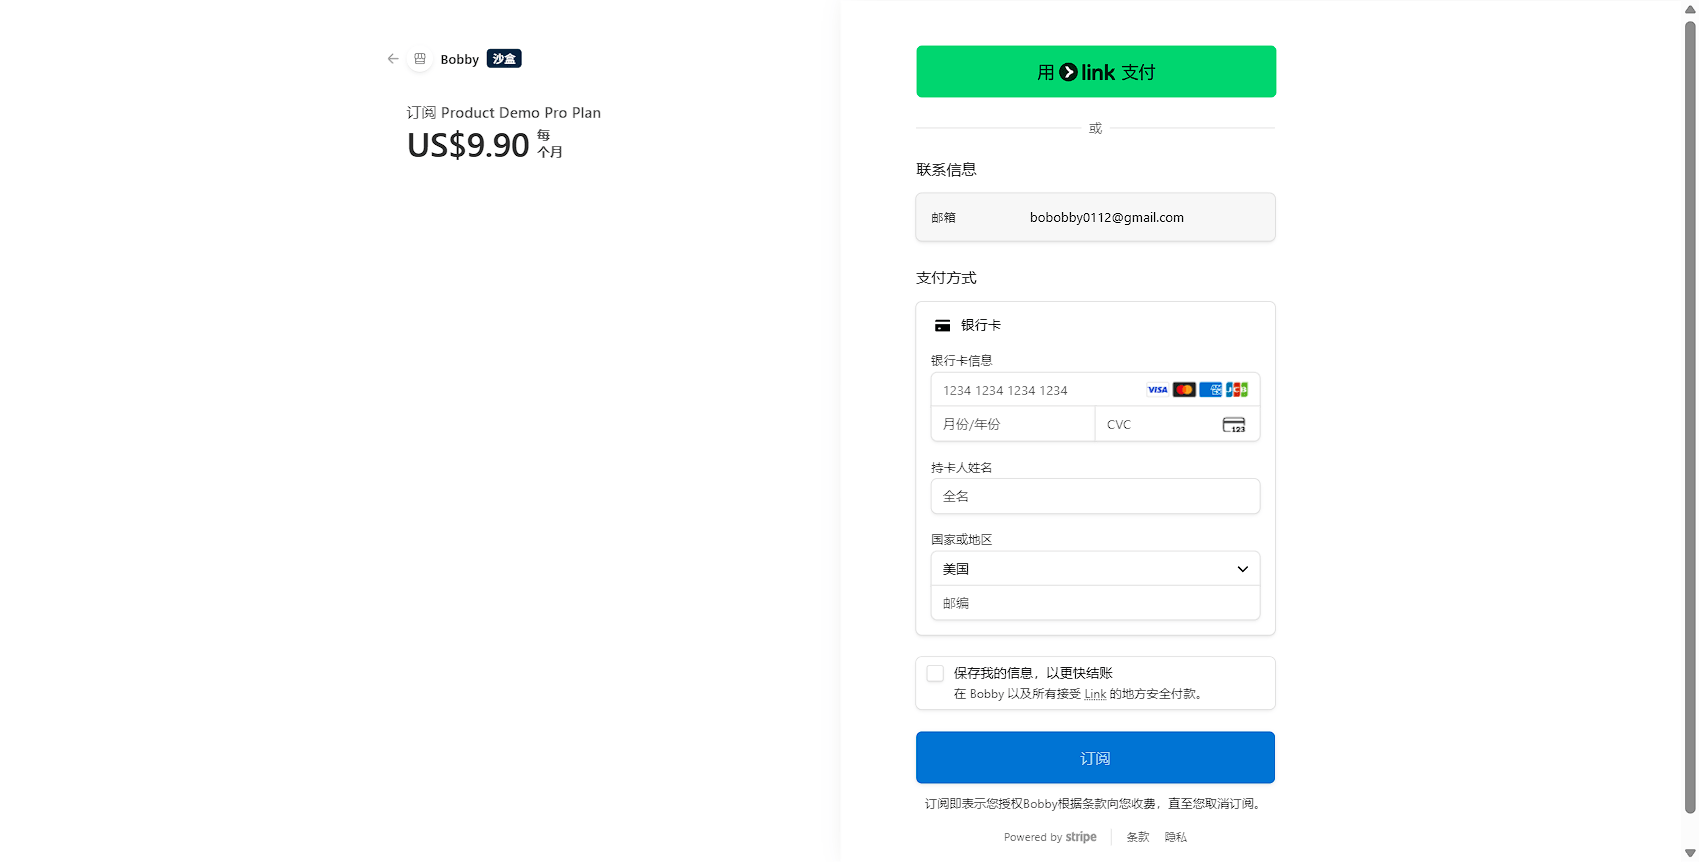
所有卡:有效期填任意未来日期(如 12/34),CVC 任意 3 位(Amex 为 4 位),其余字段随意。禁止用真实卡测试。All cards: any future expiry (e.g. 12/34), any 3-digit CVC (4 for Amex), any other fields. Never test with a real card.
| 场景Scenario | 卡号Card number | 结果Result |
|---|---|---|
| 支付成功Success | 4242 4242 4242 4242 | Visa,付款成功Visa, succeeds |
| 支付失败Decline | 4000 0000 0000 0002 | 通用拒付 generic_declinegeneric_decline |
| 支付失败Decline | 4000 0000 0000 9995 | 余额不足 insufficient_fundsinsufficient_funds |
| 支付失败Decline | 4000 0000 0000 0069 | 卡已过期 expired_cardexpired_card |
| 支付失败Decline | 4000 0000 0000 0127 | CVC 错误 incorrect_cvcincorrect_cvc |
| 需 3DS 验证3DS auth | 4000 0025 0000 3155 | 弹出二次验证流程triggers 3DS challenge |
已有 Node.js 环境,直接全局安装即可,跨平台一致:With Node.js installed, one cross-platform global install:
npm i -g @stripe/cli
验证安装成功(能打印版本号即安装完成):Verify the install (a version number means it worked):
stripe --version
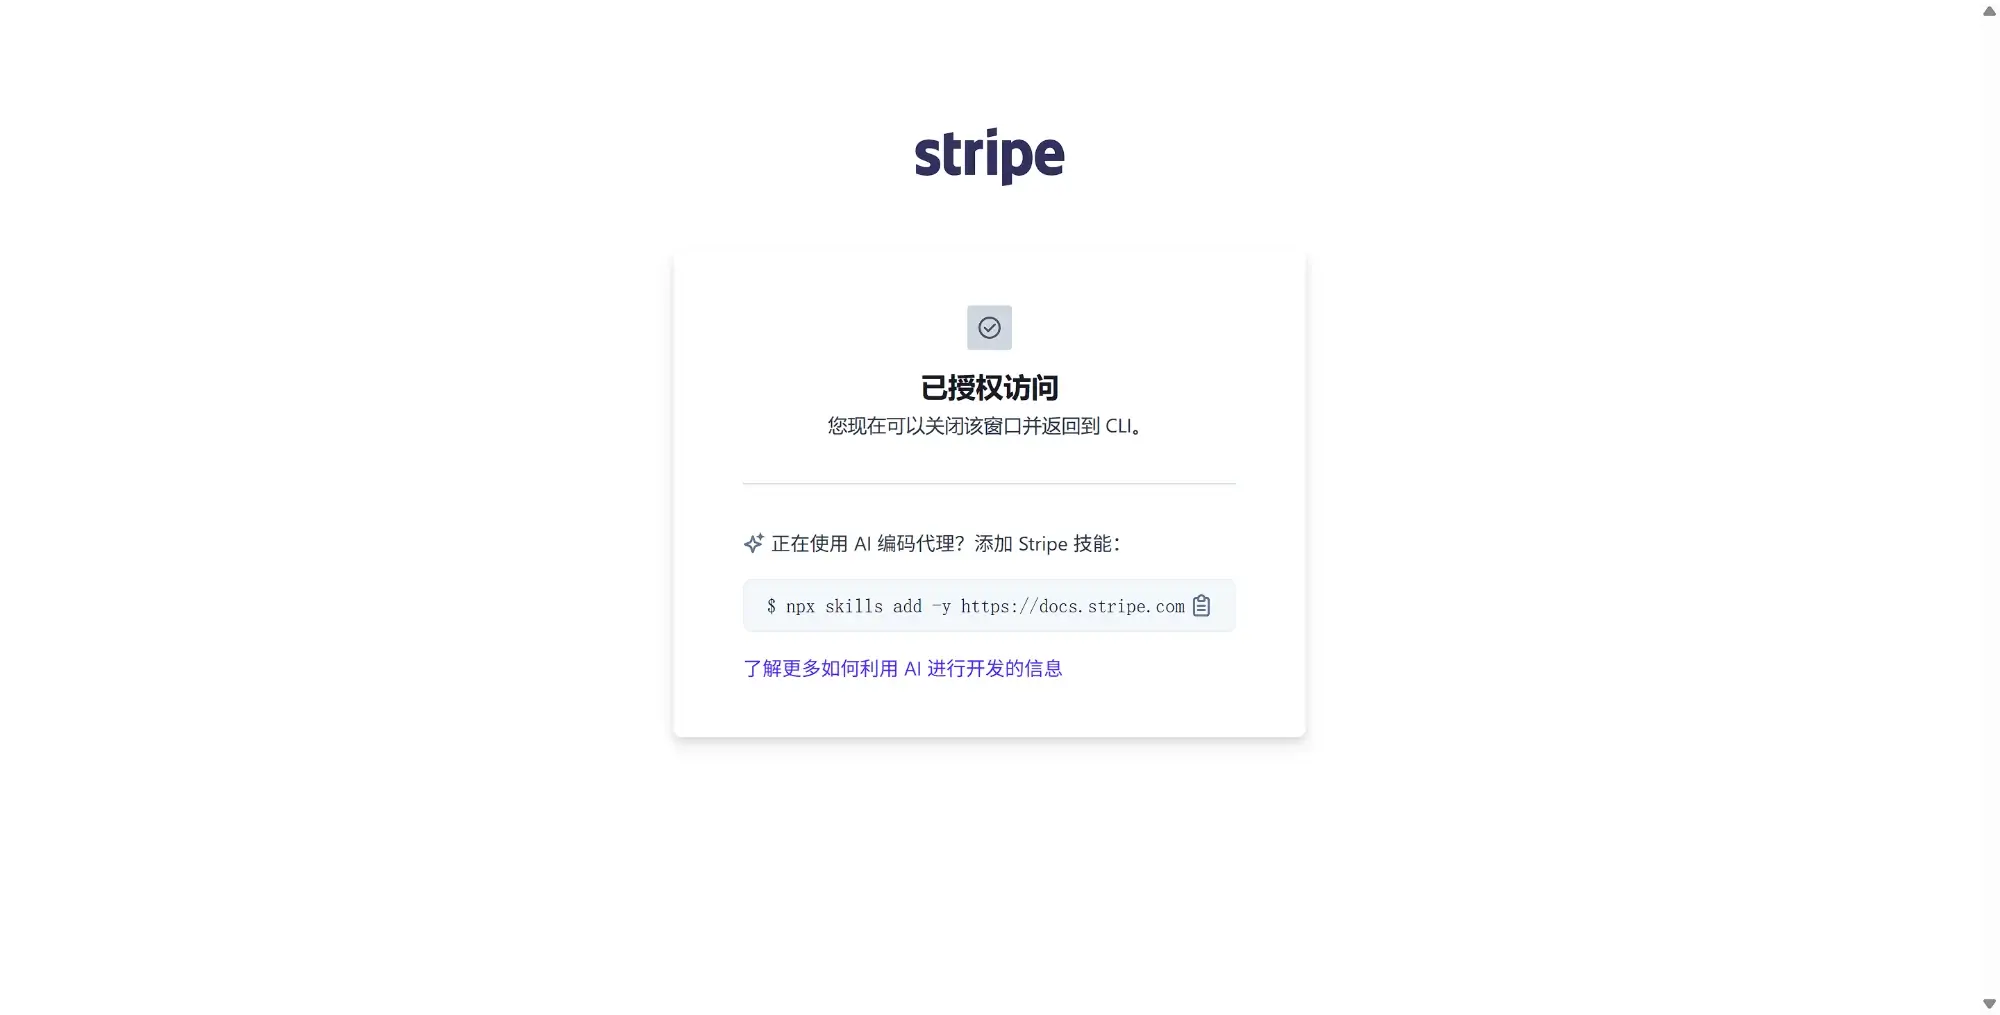
执行后会打开浏览器,点确认即把 CLI 与你的 Stripe 账号绑定:Opens a browser; confirm to link the CLI to your Stripe account:
stripe login
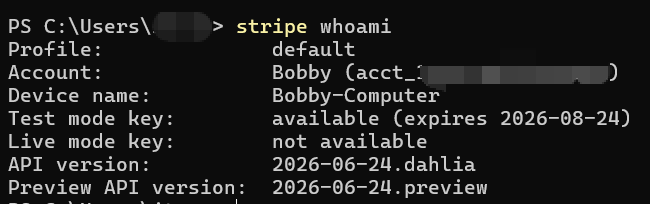
用 whoami 验证登录状态与账号信息(返回 account id / 邮箱即成功):Use whoami to verify login and see account info (returns account id / email):
stripe whoami
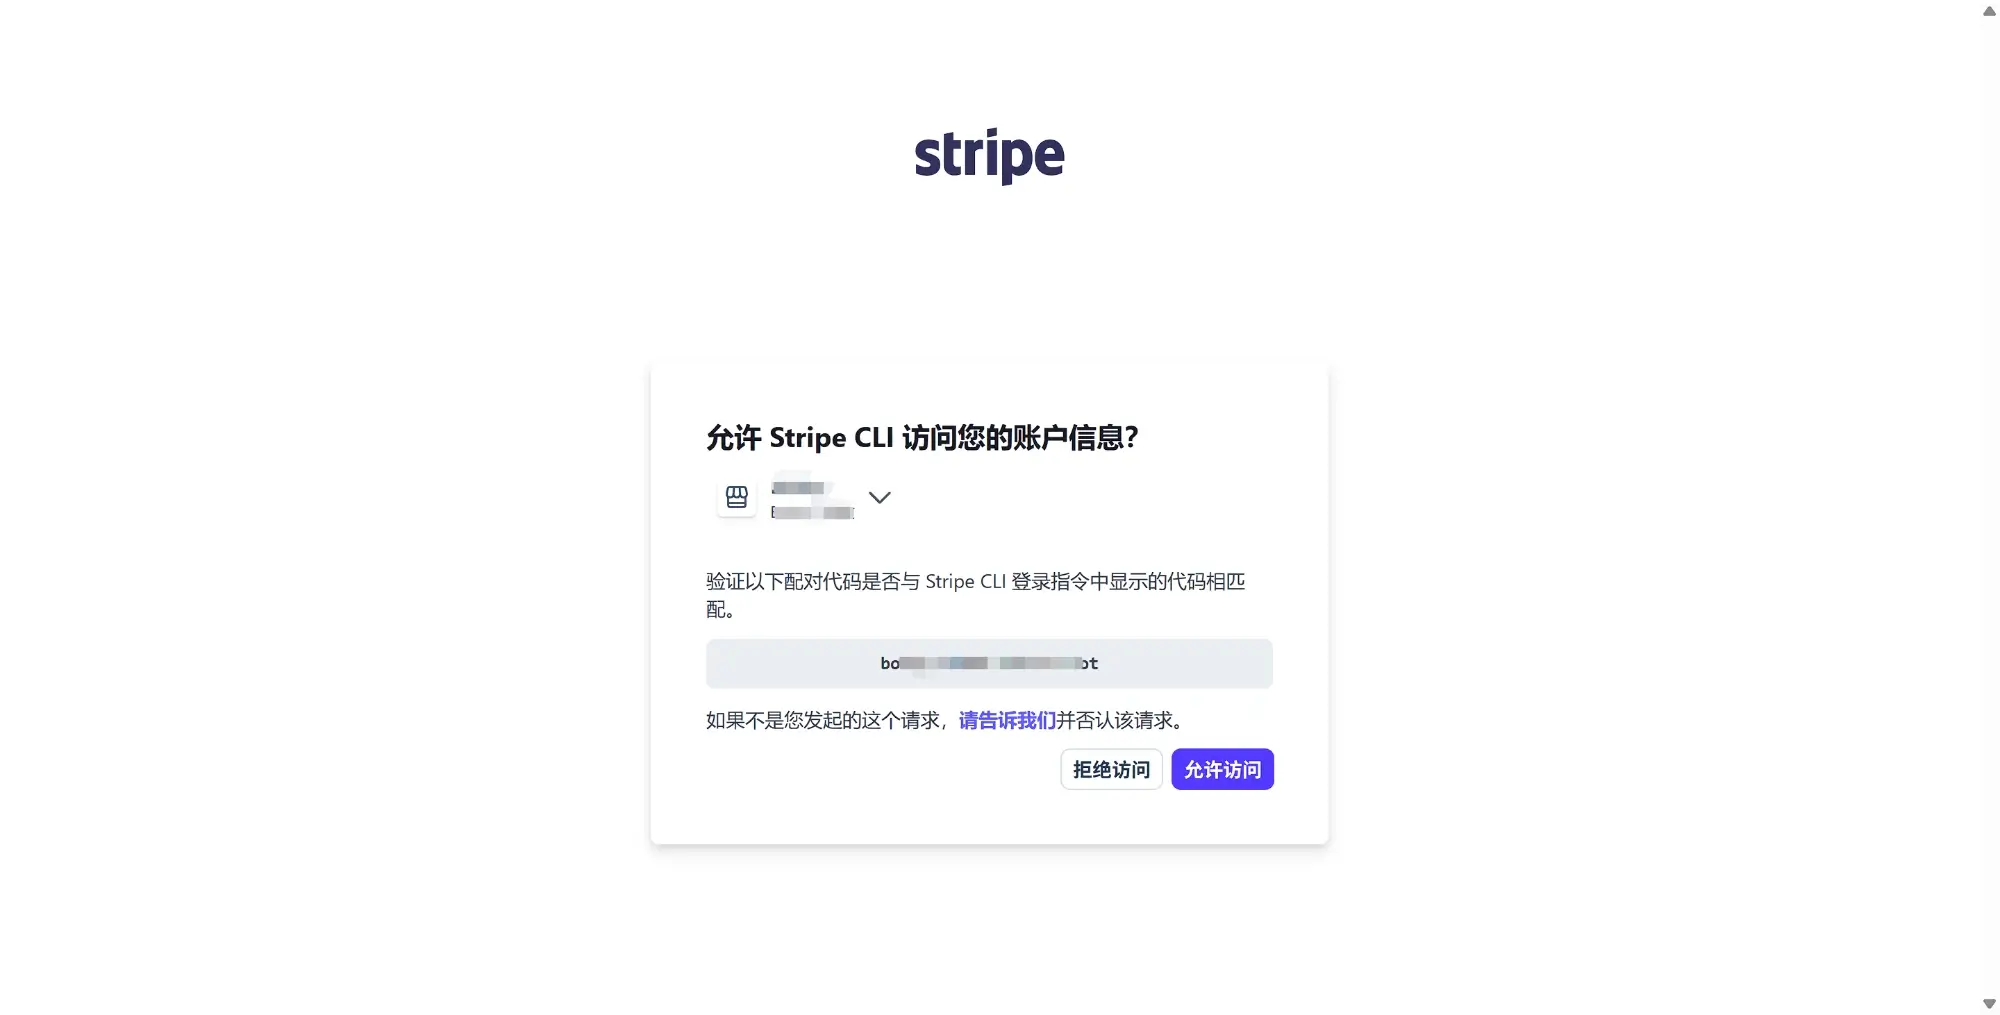
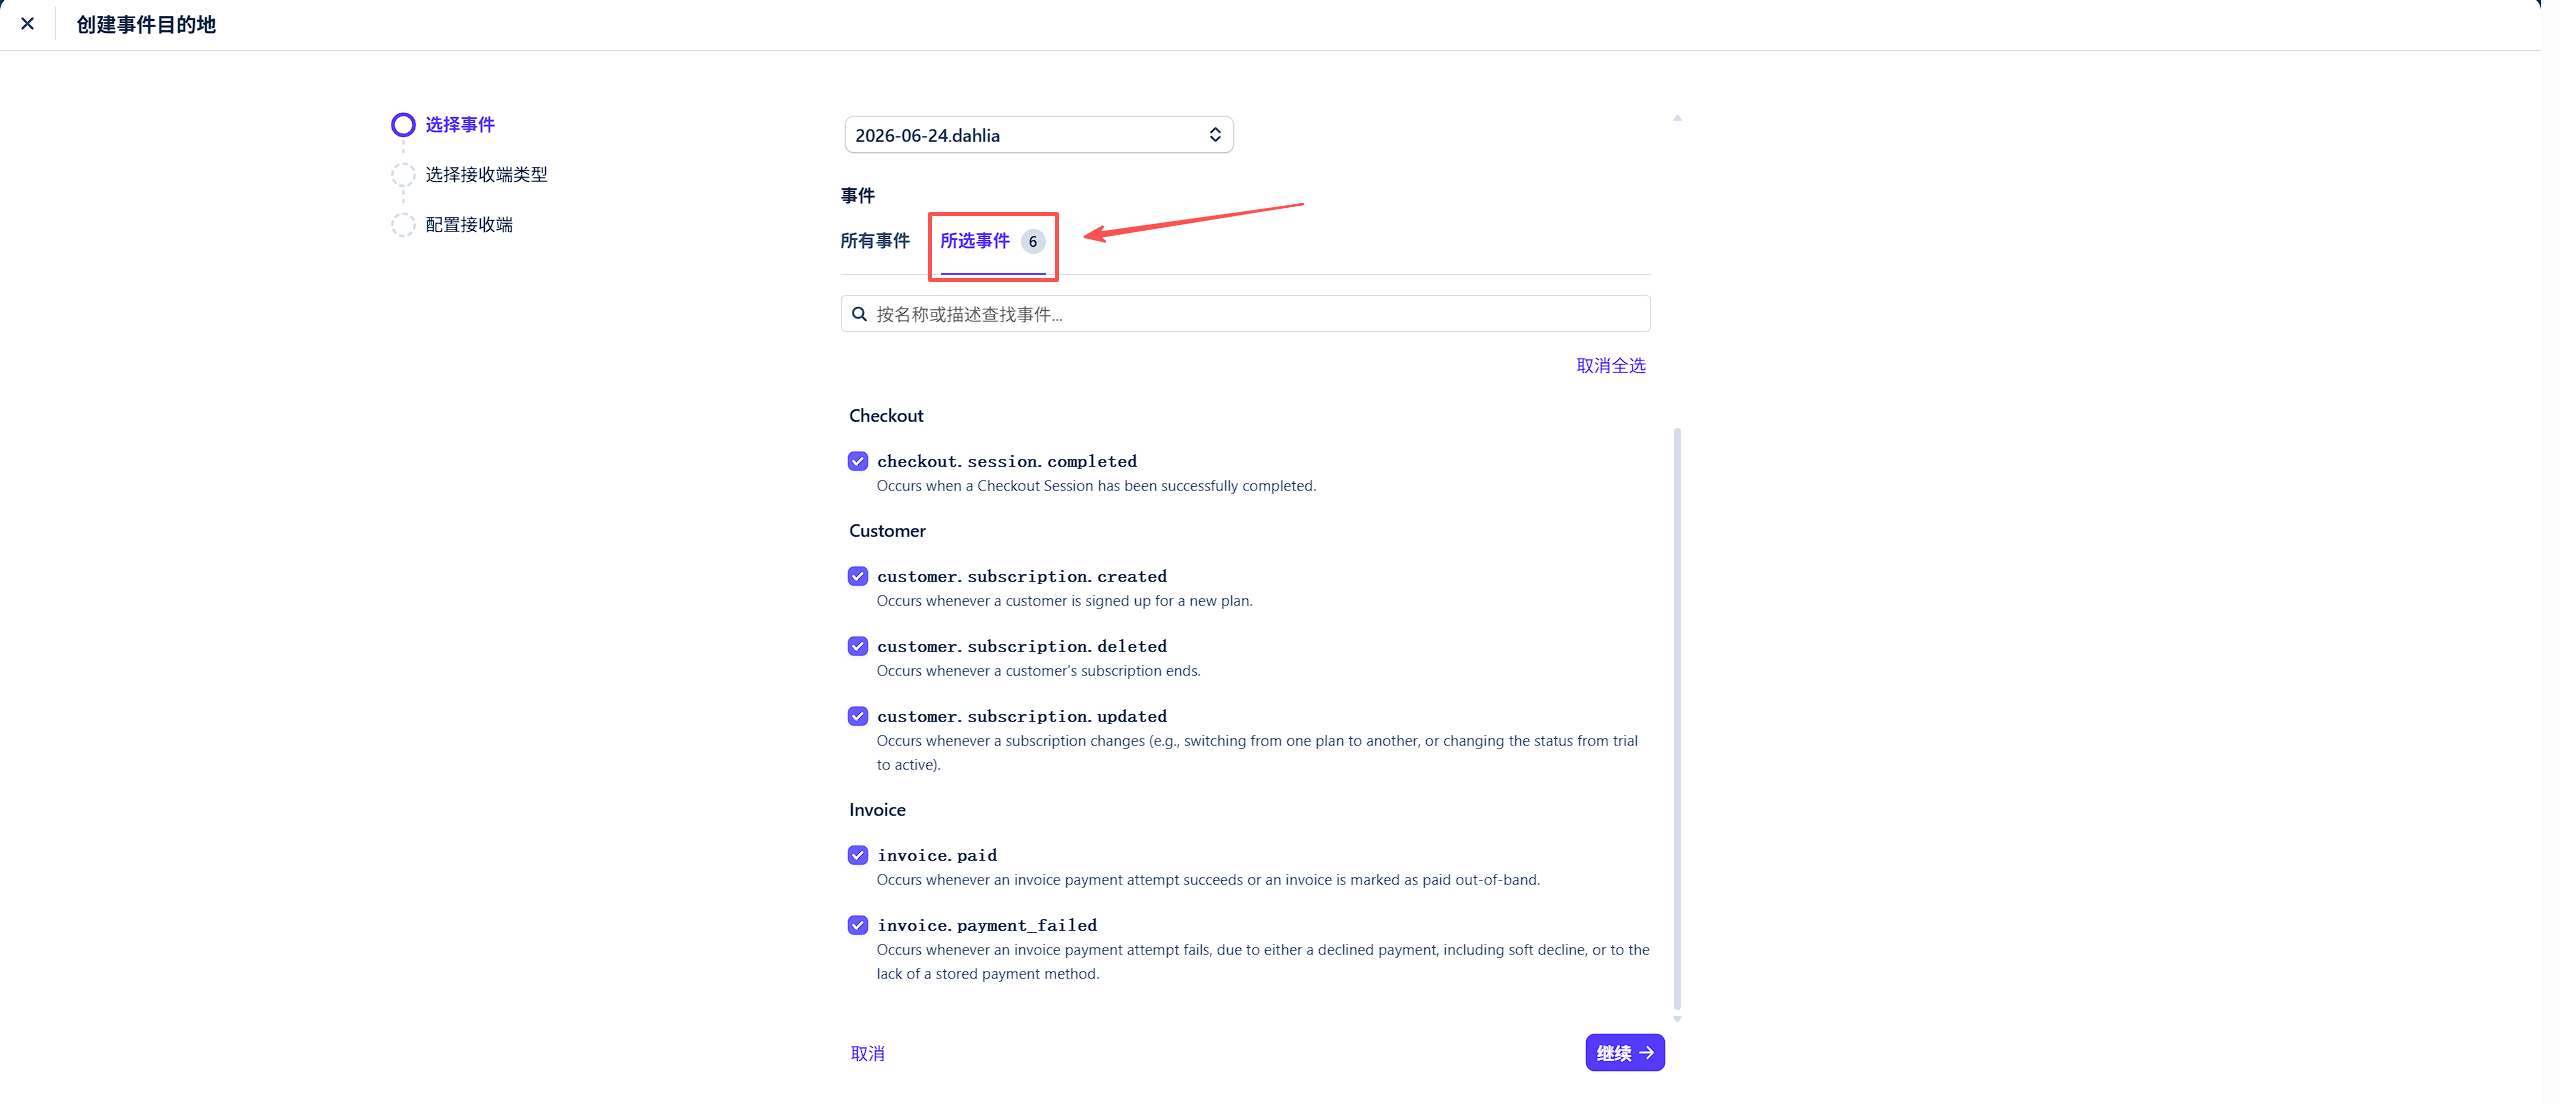
本地 localhost 没有公网地址,Stripe 云端无法直接把付款结果回调给你。stripe listen 建立一条隧道,把 Stripe 的事件实时转发到你本地的接口,本地才收得到 Webhook;同时它会打印一个 whsec_ 开头的签名密钥,配到后端环境变量里用于校验签名。Local localhost has no public URL, so Stripe's cloud can't call back your payment results directly. stripe listen opens a tunnel that forwards Stripe events to your local endpoint in real time; it also prints a whsec_ signing secret to put in your backend env for signature verification.
stripe listen --forward-to localhost:8787/api/billing/webhook

# 上面命令会输出,复制到后端环境变量:
STRIPE_WEBHOOK_SECRET=whsec_xxx
请在后端实现 Stripe Webhook 接收端。

【项目背景】
- 后端形态:【例:Cloudflare Worker / Firebase Functions / Express】
- 用户系统:【例:Firebase Auth / Supabase / 自建】
- 用户订阅状态存储位置:【例:Firestore users/{uid} 文档 subscriptionStatus 字段 / 数据库 users 表 subscription_status 列】
- Stripe Webhook Secret 已配在后端环境变量:STRIPE_WEBHOOK_SECRET

【实现要求】
1. 后端暴露 POST /api/billing/webhook 接口
2. 用 STRIPE_WEBHOOK_SECRET 验证 Stripe Webhook 签名(安全关键,不能跳过)
3. 处理以下事件并更新对应用户的订阅状态:
   - checkout.session.completed → "active"
   - customer.subscription.deleted → "canceled"
   - invoice.payment_failed → "past_due"
4. 通过 Checkout Session 的 client_reference_id 拿到当前用户 ID,定位到具体用户记录
5. 处理完返回 200 状态码(不返 200 Stripe 会重试)
6. 沿用项目现有代码风格
Implement the Stripe Webhook receiver on the backend.

[Project context]
- Backend shape: [e.g. Cloudflare Worker / Firebase Functions / Express]
- User system: [e.g. Firebase Auth / Supabase / custom]
- Subscription state storage: [e.g. Firestore users/{uid}.subscriptionStatus / users.subscription_status]
- Stripe Webhook Secret is configured in backend env: STRIPE_WEBHOOK_SECRET

[Requirements]
1. Expose POST /api/billing/webhook
2. Verify the Stripe Webhook signature with STRIPE_WEBHOOK_SECRET; this is security-critical
3. Handle events and update subscription state:
   - checkout.session.completed → "active"
   - customer.subscription.deleted → "canceled"
   - invoice.payment_failed → "past_due"
4. Use client_reference_id from Checkout Session to locate the current user
5. Return HTTP 200 after processing, otherwise Stripe retries
6. Follow existing project style
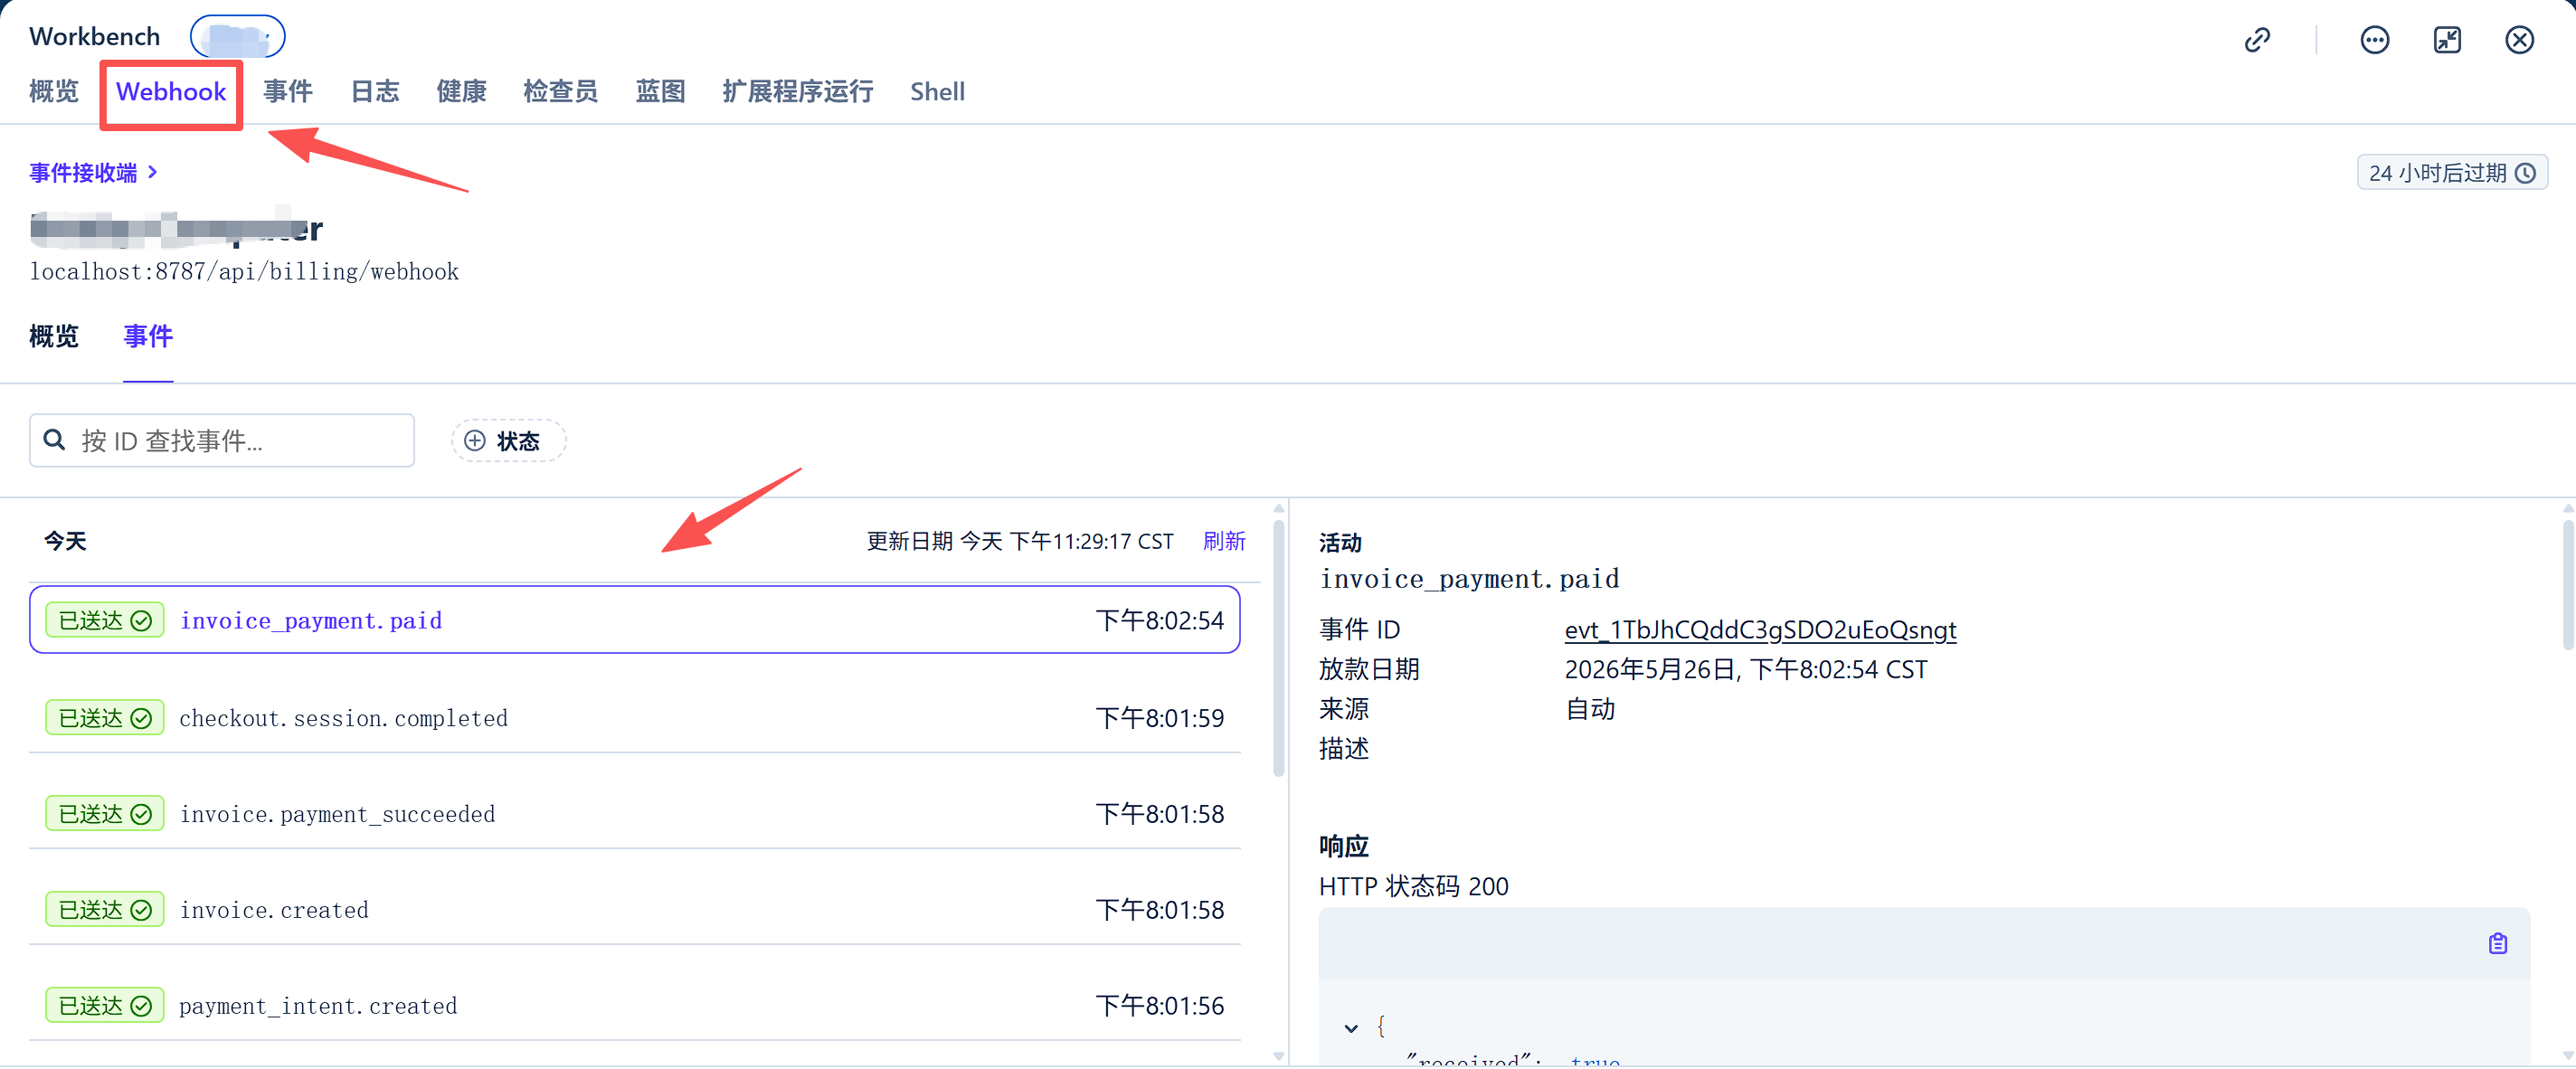
正式上线不用 CLI,而是在 Dashboard → Developers → Webhooks → Add endpoint 填线上回调地址,并只勾选业务会处理的事件(勾了不处理只会增加噪音与重试)。订阅业务推荐勾以下 6 个:In production you don't use the CLI — go to Dashboard → Developers → Webhooks → Add endpoint, enter your live callback URL, and select only the events you handle. For subscription billing, these 6 are recommended:
| 事件Event | 含义 / 何时触发Meaning / when it fires | 后端应做What to do |
|---|---|---|
checkout.session.completed | Checkout 付款流程完成Checkout flow completed | 用 client_reference_id 关联用户,开通入口Link user via client_reference_id |
customer.subscription.created | 订阅被创建(可能 incomplete 待认证)Subscription created (may be incomplete) | 记录订阅初始状态Record initial state |
customer.subscription.updated | 订阅任意变化(套餐/优惠/状态)Any change (plan / discount / status) | 状态事实来源:同步本地 = subscription.statusStatus source of truth: sync to subscription.status |
customer.subscription.deleted | 订阅结束Subscription ended | 回收 Pro 权限 → canceledRevoke access → canceled |
invoice.paid | 发票支付成功(首期或续期)Invoice paid (first or renewal) | active 事实来源:置 active、延长有效期active source of truth: set active, extend |
invoice.payment_failed | 发票支付失败Invoice payment failed | → past_due:通知用户、催缴/重试→ past_due: notify / retry |
active / trialing → 可用 Pro 功能;未订阅 / canceled / past_due → 禁用 Pro 功能,显示订阅引导。active / trialing → Pro feature available; no subscription / canceled / past_due → disable Pro feature and show subscription prompt.
权限判断必须读数据库订阅状态,不能只看支付回跳 URL。Access control must read subscription state from the database, not just the payment return URL.
请把订阅状态接入前端 Pro 功能权限。

【项目背景】
- 前端栈:【例:React + Vite / Vue / Next.js】
- 用户系统:【例:Firebase Auth / Supabase / 自建】
- 订阅状态存储位置:【例:Firestore users/{uid} 文档 subscriptionStatus 字段】
- 当前项目里要变成 Pro 的功能:【例:本演示中是“语音实战面试”,你的项目里替换为对应功能名】

【实现要求】
1. 业务规则:
   - subscriptionStatus 为 active 或 trialing → 可用 Pro 功能
   - 未订阅 / canceled / past_due → 禁用 Pro 功能,显示订阅引导
2. 前端权限判断必须读数据库订阅状态,不要只根据支付回跳 URL 判断
3. 无权限时展示订阅引导(含“开通 Pro”按钮)
4. 有权限时正常展示 Pro 功能
5. 沿用项目现有代码风格
Connect subscription state to frontend Pro feature access.

[Project context]
- Frontend stack: [e.g. React + Vite / Vue / Next.js]
- User system: [e.g. Firebase Auth / Supabase / custom]
- Subscription state storage: [e.g. Firestore users/{uid}.subscriptionStatus]
- Feature to turn into Pro: [e.g. "voice mock interview" in this demo; replace it with your project feature]

[Requirements]
1. Business rules:
   - subscriptionStatus active or trialing → Pro feature available
   - no subscription / canceled / past_due → disable Pro feature and show subscription prompt
2. Frontend access control must read subscription state from database, not just the payment return URL
3. Show subscription prompt with “Upgrade to Pro” when unauthorized
4. Show Pro feature normally when authorized
5. Follow existing project style